My waffle maker used to live in the back of a cabinet. You know the spot — that dark corner where the appliances go that you genuinely intend to use more often but somehow never do. The pasta maker, the mandoline, the immersion blender. That cabinet.
It doesn’t live there anymore. My son made sure of that.
At some point he discovered Belgian waffles and it was all over. Now the waffle maker sits on the counter year-round, ready to go at a moment’s notice, because the moment’s notice comes at least twice a week. I stopped fighting it a long time ago.
What I did do is stop making them the boring way. The recipe on the back of the Bisquick box works fine — it’ll get you a waffle — but a few small tweaks make a genuinely big difference. A little extra sugar, a splash of vanilla, an extra hit of baking powder. Nothing complicated, nothing that adds time. The result is a waffle that’s properly crispy on the outside and light in the middle, with enough flavor that you don’t need to drown it in syrup to make it interesting.
These have become the Saturday morning default in our house, and I suspect they will in yours too.
What Makes These Better Than the Box Recipe
The Bisquick box recipe is a solid foundation — the mix does a lot of the work for you — but it’s pretty plain on its own. Here’s what the additions do:
Extra sugar gives you better browning and a slightly crisp, caramelized exterior. Not enough to make the waffles sweet on their own, just enough to help them develop proper color and texture in the iron.
Extra baking powder on top of what’s already in the Bisquick gives you more lift. The result is a noticeably fluffier interior — more like what you’d get at a good brunch spot than a flat, dense homemade waffle.
Vanilla extract is the sleeper ingredient. It rounds out the flavor in a way that’s hard to put your finger on but immediately noticeable if it’s not there. Don’t skip it.
Whole or 2% milk — don’t use skim. The fat in the milk contributes to both flavor and texture. This isn’t the place to save calories.
Waffle Iron Tips
Preheat properly. Give your waffle iron a full 5 minutes to heat up before the first waffle goes in. A fully preheated iron is what gives you that immediate sear on the outside of the batter, which is how you get a crispy exterior.
Don’t overspritz with cooking spray. Spray the iron once before the first waffle. After that, only spray again if waffles start to stick. Over-spraying builds up a residue that actually makes sticking worse over time and gives the waffles a slightly greasy taste.
Don’t overfill. Follow your waffle maker’s recommended fill amount. Overfilling just means batter running out the sides and a mess on your counter — it doesn’t give you a bigger waffle.
Don’t lift the lid early. I know it’s tempting to check. Resist. Opening the iron before the waffle is ready pulls it apart. Most irons have an indicator light — wait for it.
Keep them warm in the oven. Set your oven to its lowest setting (usually 170°F-200°F) and transfer finished waffles to a wire rack on a baking sheet inside. This keeps them warm and maintains the crispiness while you finish the batch. Stacking them on a plate just makes them soggy.
Don’t Overmix the Batter
This is the most important technique note. When you combine the wet and dry ingredients, mix until just combined — lumps are fine and expected. Overmixing develops the gluten in the flour, which makes waffles tough and chewy instead of light and tender. Stir until you don’t see dry flour, then stop.
Easy Bisquick Belgian Waffles
Equipment
- Belgian Waffle Machine
Ingredients
Dry Ingredients
- 2 cups Bisquick
- 3 tbsp sugar
- 2 tsp baking powder
Wet Ingredients
- 1 cup milk whole or 2%
- 2 eggs large
- 3 tbsp vegetable oil
- 1 tbsp vanilla extract
Instructions
- Preheat. Turn your oven to its lowest setting to keep finished waffles warm. Turn on your waffle iron to preheat — give it at least 5 minutes.
- Mix the dry ingredients. Combine the Bisquick, sugar, and baking powder in a large mixing bowl and whisk together.
- Add the wet ingredients. Add the milk, eggs, vegetable oil, and vanilla to the dry ingredients and stir until just combined. Some small lumps are fine — do not overmix.
- First waffle. Spray the waffle iron with cooking spray or brush lightly with vegetable oil. Pour or scoop the batter onto the bottom surface according to your waffle maker's fill guidelines. Close the lid and cook until golden brown. Timing varies by machine — use your iron's indicator or check after 3-4 minutes.
- Keep warm. Transfer finished waffles to a wire rack on a baking sheet in the oven to stay warm and crispy while you finish the rest of the batch. Only re-spray the iron if waffles start sticking.
- Serve together. Once all the waffles are done, bring them out and serve while warm.
Notes
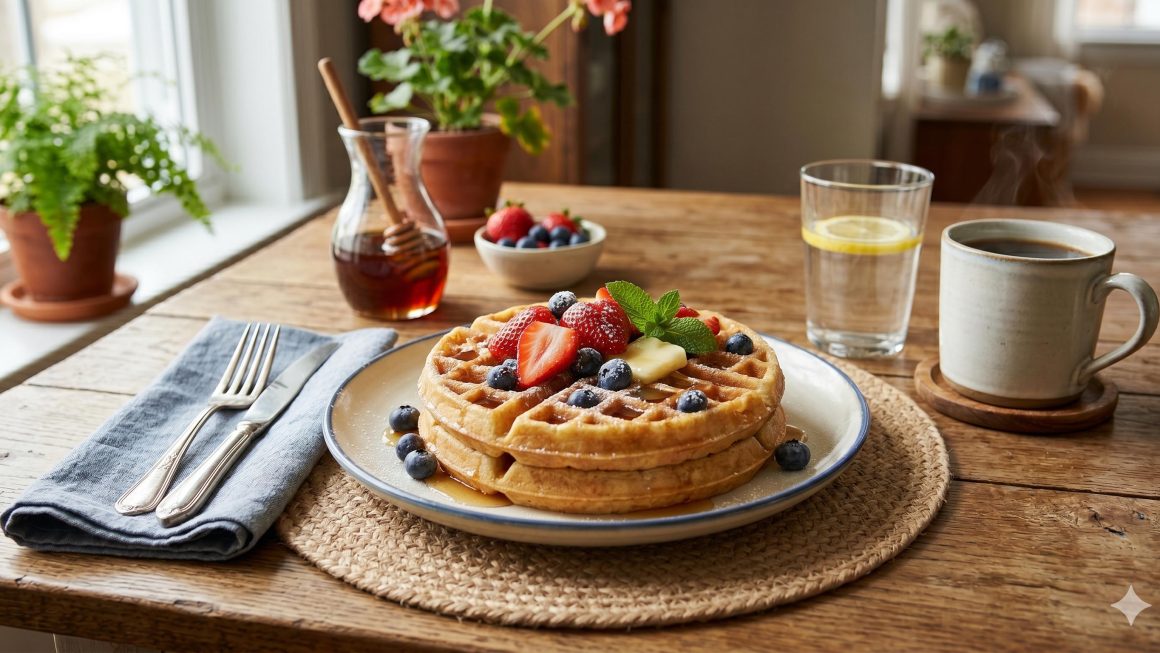
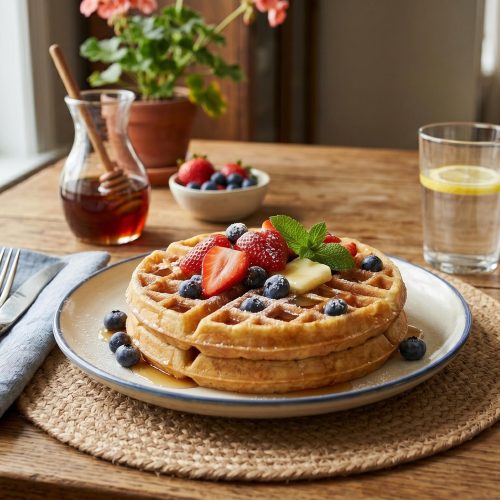
Topping Ideas
The beauty of a good Belgian waffle is that it works in just about any direction you want to take it:- Classic — salted butter and real maple syrup
- Fruit — fresh strawberries, blueberries, or a quick berry compote
- Savory — fried chicken on top is one of the great combinations in American food
- Dessert — vanilla ice cream, hot fudge, whipped cream, chopped nuts. The waffle cone was basically invented for this.
Storing and Reheating
Leftover waffles freeze surprisingly well. Let them cool completely, then freeze in a single layer on a sheet pan before transferring to a zip-lock bag. Reheat straight from frozen in the toaster — they come out crispy and taste almost as good as fresh. This makes them a genuinely useful weekday breakfast option since the work is already done.The waffle maker is staying on the counter. At this point I’ve accepted it. If you make these, you’ll understand why.